Honeywell TH6320U2008 Installation Guide
Welcome! This guide simplifies the Honeywell TH6320U2008 thermostat installation. It offers comprehensive, accessible, and free instructions for a smooth setup. Follow these instructions for UWP mounting, wiring, and system configuration. The device provides consistent temperatures and comfort in residential and commercial settings.
Package Contents
Before commencing the installation of your Honeywell TH6320U2008 T6 Pro Programmable Thermostat, it is crucial to verify that all the necessary components are present within the package. This ensures a smooth and efficient installation process, preventing any unnecessary delays or complications. Begin by carefully opening the packaging and laying out the contents on a clean, well-lit surface.
The standard package should include the T6 Pro Programmable Thermostat unit itself, which serves as the primary interface for controlling your home’s heating and cooling systems. Additionally, you should find the UWP mounting system, designed for easy and secure attachment of the thermostat to the wall. Essential mounting hardware, such as screws and wall anchors, are also included to facilitate the physical installation.
Wiring labels are provided to assist in correctly identifying and connecting the various wires from your HVAC system to the thermostat. A quick installation guide offers a concise overview of the installation steps, while the comprehensive installation manual provides detailed instructions and troubleshooting tips. Finally, an optional cover plate may be included to conceal any existing wall imperfections or to provide a more aesthetically pleasing finish. Ensure all these items are present before proceeding with the installation.
Safety Precautions
Prior to initiating the installation of the Honeywell TH6320U2008 thermostat, it is imperative to prioritize safety by adhering to the following precautions. These measures are designed to prevent electrical shock, equipment damage, and potential hazards during the installation process.

Firstly, always disconnect power to the heating and cooling system at the breaker box or switch before commencing any wiring or installation work. This crucial step eliminates the risk of electrical shock. Exercise caution when handling electrical components and wiring, ensuring hands are dry and tools are properly insulated.
Secondly, be aware that compressor protection is often bypassed during testing. Avoid running the system in test mode for extended periods to prevent potential damage to the compressor. Carefully follow the wiring diagrams and instructions provided in the manual to ensure correct connections. Incorrect wiring can lead to equipment malfunction or damage.
Thirdly, when mounting the thermostat, avoid over-tightening screws, as this can damage the unit or the wall. Ensure the thermostat is securely attached but not subjected to excessive force. If you are unsure about any aspect of the installation, consult a qualified electrician or HVAC technician. Your safety and the proper functioning of your equipment depend on careful adherence to these safety precautions.
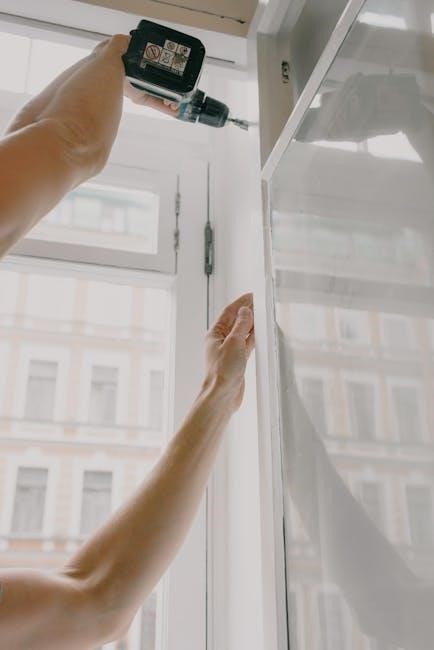
UWP Mounting System Installation
The Honeywell TH6320U2008 thermostat utilizes a UWP (Universal Wiring Platform) mounting system for easy installation. Prior to commencing, ensure the power is disconnected at the breaker or switch. Begin by opening the package and locating the UWP. Position the UWP on the wall where the thermostat will be mounted, ensuring it is level for accurate temperature readings.
Next, mark the wall through the UWP mounting holes to indicate where the screws will be placed. Pre-drill holes if necessary, especially when mounting on hard surfaces like drywall or plaster. Insert wall anchors into the drilled holes to provide a secure hold for the screws.
Pull the door open on the UWP and insert the thermostat wires through the wiring hole. Place the UWP over the wall anchors, aligning the mounting holes. Insert and tighten the mounting screws provided with the thermostat, ensuring the UWP is firmly attached to the wall. Avoid over-tightening the screws to prevent damage.
If an optional cover plate is not required, this completes the UWP mounting process. Proceed to wiring the system according to the wiring diagrams in the manual.
Wiring Conventional Systems
After the UWP is securely mounted, proceed to the wiring of conventional systems, which typically include forced air and hydronic heating setups. Carefully identify the existing wires from your old thermostat and compare them to the wiring designations on the UWP. Ensure to consult the wiring diagrams provided in the Honeywell TH6320U2008 installation manual for accurate connections.
Connect each wire to the corresponding terminal on the UWP. Common terminals include R (power), W (heat), Y (cooling), G (fan), and C (common wire). If your system has separate wires for heating and cooling, connect them accordingly to the Rh and Rc terminals. For systems with a heat pump, refer to the manual for specific wiring instructions, including setting the changeover valve to either O (for cool changeover) or B (for heat changeover).
Double-check all wiring connections to ensure they are secure and properly inserted into the terminals. Loose or incorrect wiring can lead to system malfunctions or damage. Once the wiring is complete, carefully tuck the excess wire back into the wall opening to avoid interference with the thermostat mounting;
Thermostat Mounting
With the UWP securely installed and the wiring correctly connected, the next step is to mount the Honeywell TH6320U2008 thermostat onto the UWP. Gently align the thermostat with the UWP, ensuring that the pins on the back of the thermostat line up with the corresponding slots on the UWP. Carefully push the thermostat onto the UWP until it clicks into place, indicating a secure connection.
If you are using the optional cover plate, ensure it is mounted on the wall using the provided screws before attaching the UWP. The cover plate provides a larger surface area to cover any existing marks or holes from the previous thermostat. Once the thermostat is mounted, ensure it is level for aesthetic purposes and accurate temperature readings.
After the thermostat is mounted, you can insert AA batteries for primary or backup power. This ensures that the thermostat continues to function even during power outages. Finally, remove the protective film from the thermostat display to reveal the clear screen.
System Operation Settings
Configuring the system operation settings on your Honeywell TH6320U2008 thermostat is crucial for optimal performance. Begin by accessing the installer setup menu, where you can define key parameters such as the heating and cooling system types. This ensures the thermostat communicates correctly with your HVAC equipment. Set the heat system type based on your equipment, whether it’s a heat pump or a conventional system.
Next, configure the changeover valve setting to “O” for cool changeover or “B” for heat changeover, depending on your system’s requirements. You can also configure the thermostat for separate auxiliary and emergency heat if needed. If you have a heat pump, set the appropriate compressor settings to ensure efficient operation.
Finally, adjust the fan operation settings to control how the fan runs during heating and cooling cycles. These settings ensure the thermostat operates efficiently and meets your comfort preferences. Proper configuration maximizes energy savings and maintains a consistent and comfortable indoor environment.
Program Schedule Adjustment
Adjusting the program schedule on your Honeywell TH6320U2008 thermostat allows you to customize temperature settings based on your daily routine, optimizing comfort and energy efficiency. The thermostat offers flexible programming options, including 7-day, 5-2, and 5-1-1 schedules to suit various lifestyles. Access the program schedule menu to set different temperatures for specific times of the day.
For each day or day group, define multiple periods with corresponding temperature settings. For example, you can set a lower temperature during the day when you’re away and a warmer temperature for when you return home. Utilize the temporary override function to deviate from the set schedule when needed, such as during unexpected schedule changes.
Review and adjust the schedule regularly to reflect changes in your lifestyle or seasonal temperature variations; By fine-tuning the program schedule, you can maximize energy savings without compromising comfort. The easy-to-use interface guides you through the process, making it simple to create a personalized and efficient heating and cooling plan.
Troubleshooting Common Issues
Encountering issues with your Honeywell TH6320U2008 thermostat can be frustrating, but many common problems have simple solutions. If the display is blank, ensure the thermostat has power, checking or replacing batteries if necessary. For heating or cooling malfunctions, verify that the system switch is set to the correct mode (Heat, Cool, or Off) and the fan switch is set appropriately (Auto or On).
If the thermostat is not responding to temperature adjustments, confirm that the set temperature is within a reasonable range and that the system is not locked. A flashing “Heat On” or “Cool On” indicator may suggest a system error or delay; consult the system’s manual for specific troubleshooting steps.
Wiring issues can also lead to malfunctions; double-check all wire connections to ensure they are secure and correctly matched to the terminals. If problems persist, resetting the thermostat to its factory settings might resolve software glitches. If these steps fail to resolve the issue, contacting a qualified HVAC technician for professional assistance is recommended.
Warranty Information
The Honeywell TH6320U2008 thermostat typically comes with a limited warranty from Honeywell Home, offering protection against defects in materials and workmanship. The standard warranty period is often five years from the date of purchase. This warranty ensures that Honeywell will repair or replace any defective thermostat, provided it is returned during the warranty period.
To make a warranty claim, you will generally need to provide proof of purchase, such as a receipt, and a detailed description of the issue. The warranty does not cover damages resulting from improper installation, misuse, neglect, or unauthorized repairs. It is crucial to follow the installation instructions and use the thermostat as intended to maintain warranty validity.
For specific warranty details, it is recommended to consult the documentation included with your thermostat or visit the Honeywell Home website. Understanding the terms and conditions of the warranty will help ensure that you can effectively address any potential issues that may arise during the coverage period.